Pretty bland, not too great as far as "appeal" goes (in my mind). It was this marroon-y brown which was just...blah.
So, I decided red was a must. I know it's nothing new or inventive but red is a tried and true color for doors which give the house some life and can really punch up the drama. So off to the store to buy supplies.
I started by priming my door (suggested by the employee at Home Depot):
Sorry for the poor pictures. It was overcast and I was lazy. It's a gray tinted primer and I believe I put on 2 coats. (first remove your door hardware).
I also decided to paint (inexpensive option) my hardware instead of replacing them (more expensive).
The hardware was this tacky brassy handle but I figured a couple of coats of black would look much better.
I bought a can of black spray paint (specifically for metal fixtures) for approx 3.00 (instead of the 25.00+ it may have cost to replace the hardware all together).
Here's the hardware after 1 coat:
Not a huge noticeable difference but after 2 more coats we were in business.
After painting 3 coats of my lovely red (I don't recall the exact color -it was Glidden) and replacing the hardware it was looking fantastic! But I still wanted to make it a little bit more special.
So, I decided to paint our house numbers on my door. Like this:
This was easy and cost me 0 dollars. Sure, I could have made it easier and purchased vinyl lettering for very little but which is better-very little or none at all? (monetarily speaking)
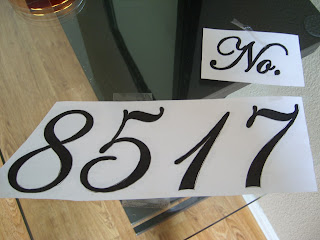
I started with finding a font I liked and a size that worked for my door and printed it off my computer:
Then, in order to make it easy to transfer-I shaded in the back of my picture completely- like this:
I cut around the numbers as close as possible in order to align it correctly. Then I taped it to the door, making sure that it was straight and evenly spaced:
All it required was tracing the numbers which transfers the graphite on the back of the paper to the door:
After which, I used black acryllic paint to fill in and voila!
This process only took about 45minutes and most of that was the precision of the black paint on the door.
I also applied a coat of poly to it to protect it and it's good as new:
This project took no more than 5-6 hours total from start to finish (painting the door to stensiling to poly), though I did break it up in order to let the paint dry.
And the before and after:
Every time I look at my door now I feel happy instead of bleak and it certainly looks more welcoming rather than depressing.


Love it! Can't wait till I can come out there and see all that you have done to your home.
ReplyDelete