
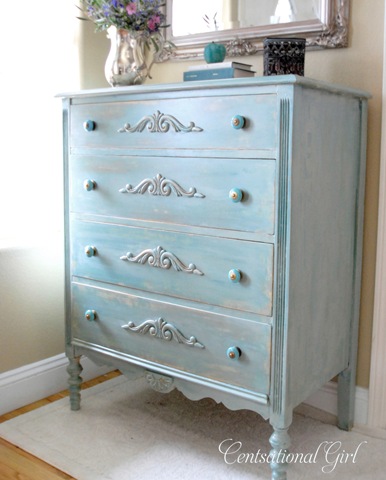
Okay, get ready for a picture heavy post. Because I mucked this up really well (hey, it was a risk!) I want to take you through every.single.agonizing step I took to result in this creation. First off, the inspiration:
I started with my Craigslist nightstand for 10.00:


I started by taking off the hardware (which I will replace since I don't like) and filling in the holes :


I bought a paint sample for 3.00 (Walmart) in the color I wanted (Glidden-Deepest Aqua):


Anyhow.
So, I painted another coat with more paint/less water ratio.
Problem was...the brush strokes showed so easily-it ended up like this:


But I forged ahead thinking the other coat of different paint would cover that up.
So, this is where I veered off a little from her tutorial by mixing a dark grey and a light grey I already had from Glidden (sorry I can't recall the names) which made a muddy stone color rather than her silvery light grey she used:


UGH. Still streaky and looks like I just poured water down the side of it. So, I went to sanding it which made it slightly better but...not really great. It just looked trashy. See?


At this point, I pretty much gave up for the night (it was late). And sure, the lighting is bad. The drawers for the night stand aren't even done (have yet to sand down the holes I filled in-or paint them). And yes, I started out with a white dresser, not a "wood tone". So it's bound to look different than my inspiration. I will try and salvage this piece (or repaint it). I don't have an official "after" pic. But what I saw I didn't like. Still, I'm glad I did it. And I will definitely take another stab at it (maybe with more patience and attention-to-detail rather than the laissez-faire attitude I started out with). This was definitely a risk though (out of my comfortable, white, white, white).
When I'm truly finished I'll post the after product but I wanted to start this post so I could link to her risk party.
Stay tuned for the update!

Hi, I got here from a link from a link from a link.....anyway.
ReplyDeleteI AM SO GLAD YOU POSTED THIS! So many times I see such perfect re-dos, and think that everyone else always has great results when in reality, I'm sure there are lots of times when things are more of a learning experience than a fabulous make-over. Thank you for keeping it real, and not being afraid to show us. And good luck with it.
here from the Nester's and I am so going to ditto Cathie!
ReplyDeletethanks for keeping it real :)
I love your honesty. I love your tenacity in trying. Sleep on it, and keep trying. It will ultimately turn out great. I am your latest follower. I would love for you to come and check out my blog and follow me back at www.diybydesign.blogspot.com. Thanks so much.
ReplyDeleteLooking good!! It is going to be pretty.
ReplyDelete