

Now this is the story all about how my hole got flip turned upside down...
Okay, awful, I know. But it got covered, not flip turned upside down. But I'd still like to take a minute, just sit right there, I'll tell you all about how I did it with a bit of cheap flair...
All right, all right. I'll stop. It's bad, I know.
My hole was used over Christmas for my cute little Christmas village:

But otherwise, it was completely useless to us. So, I had the brilliant idea to cover it with paneling. Similar to this look, which I found on Pinterest:

I used a tutorial here to help me with what material to use. In all, I only spent about 30.00 on this project which was awesome. Almost half of that was the amount for the boards that were cut (about 14.00). I simply took a picture and showed it to the Home Depot guy and he showed me the board, I told him the measurements I needed, and he cut them. Easy-peasy.
The not so easy part was figuring out a stud. See, I wanted to place a 2x4 stud in the middle of the hole for better support; and, in case I wanted to hang something on the finished paneling, there would be a stud right in the middle to nail/screw into.


So I took the measurement for the opening from the top of the hole to the top of the shelf and added a 2x4 (cut to size by HD again).
I simply screwed it in on the bottom:


But when I started to place the planks there was still a gap between the plank and the 2x4 because the shelving unit was slightly inset from the surrounding wall (you can sort of see what I mean in the above pic). This caused the gap below:

Ugh. I've never professed to being a carpenter or "handy". Mostly I just wing it. I'm sure a true DIY would've figured this out ahead of time and done it in a neater fashion. All I do is rig stuff!
So I had to improvise and add another board (I used a fence post board I had laying around for the thin width). That way when I placed the planks against the wall it also was flush with the "stud" in the middle.

After that it was smooth sailing. I simply used finishing nails (already had) and nailed the planks in the wall. They were very thin and light so no screws were needed. Oh, and if you're wondering about the fact that I'm closing up the cable plug- there were already 2 more set up in the living room (yay). So I was only closing one that would never been used.
Here it is half way through:

And after nailing them all in:
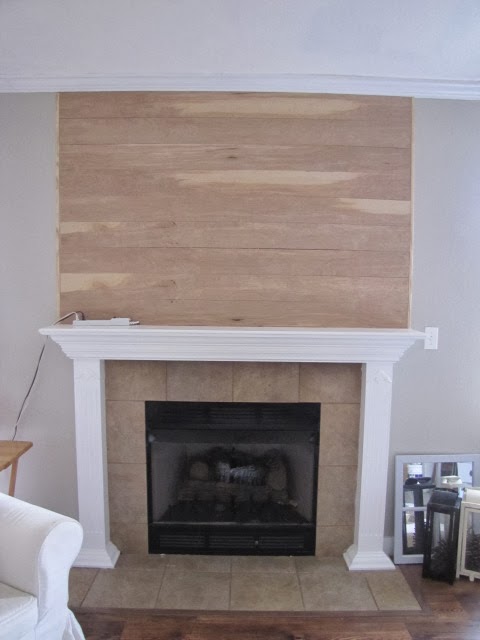
I also added small trim to the sides for a more finished look to cover the rough edges:

All of this was accomplished by simple finishing nails since the plywood was so very light. I didn't liquid nails any of the boards even though I could have for a more secure fit, because I wanted to give the next owners the option to take it down without ruining the drywall (though Luhvah pointed out that it's unlikely they'd even know it was there, nor would they need it open since it's for the old tube tvs).
Now all that's left is priming and painting.
I'll be back later to show you the finished results!

No comments:
Post a Comment